Tutorial! Your Friendly Neighborhood Skully Necklace…

July is birthday month in my family.

My Grandma, Dad, Cousin, both my sisters and I are allllll born this month.
And just to spice things up, my parents unconsciously decided to have my sisters and I all within a day of each other.

So what better way to get out of a mid-summer craft funk than with lots of impending birthday parties? (No better way obviously.)

My littlest sister is super-cool and original, (in those early teen years, that’s a feat!) has gauged ears (ALREADY!) and wants to be a tattoo artist (a profession my mother actually endorses).

All in all, she’s a pretty hep cat.

So I decided to make something that would fit her personality.

A friendly family of felt skulls she can wear around her neck!!

This is a super easy project and the technique could be used to make a felt necklace out of any design IN THE WORLD you can draw, photocopy or find clip art of! ANYTHING!!!!

(Ok now, don’t get too excited)

Continue reading

Tutorial! Your Friendly Neighborhood Skully Necklace…

July is birthday month in my family.

My Grandma, Dad, Cousin, both my sisters and I are allllll born this month.
And just to spice things up, my parents unconsciously decided to have my sisters and I all within a day of each other.

So what better way to get out of a mid-summer craft funk than with lots of impending birthday parties? (No better way obviously.)

My littlest sister is super-cool and original, (in those early teen years, that’s a feat!) has gauged ears (ALREADY!) and wants to be a tattoo artist (a profession my mother actually endorses).

All in all, she’s a pretty hep cat.

So I decided to make something that would fit her personality.

A friendly family of felt skulls she can wear around her neck!!

This is a super easy project and the technique could be used to make a felt necklace out of any design IN THE WORLD you can draw, photocopy or find clip art of! ANYTHING!!!!

(Ok now, don’t get too excited)

Materials:

Felt!
Freezer paper  (Like wax paper but with wax on only one side. Check you grocery store.)
Iron
Drawing utensil (I like pencils. I find them to be a classic.)
Exacto knife + cutting mat
Scissors
Fabric paint (regular paint might actually work too. I’ll explain later…)
Something pointy (embroidery needle, push pin, etc…)
Necklace chain + jump rings / or a nice fancy ribbon

Step 1:

Draw your design on the back (the not shiny/not waxy side) of the freezer paper. Keep it simple because you’ll have to cut out all the little details.
Also, keep things (like the skull heads) connected, unless you plan on doing something crazy and connecting the peices with jump rings or something (you’re on your own with that).

Step 2:

A. Cut out your design! The spaces you cut out is where the paint will go, so plan your designs and cut accordingly!

B. Lay the design on your felt (put all the little center pieces like my skull eyes in place too) and press your iron over them until
they stick to the felt.
Don’t set the iron on the felt for too long, you might melt it!

Step 3:


Once all the corners are stuck nicely, PAINT! Make sure you cover all the exposed felt.
Once it is dry you can apply a second coat (I got too lazy though).
I haven’t tried it, but acrylic paint (as opposed to fabric paint) might work well too. Felt soaks up a lot of whatever you put on it, so something that gets good coverage is best.

Step 4:

PEEL THE PAPER OFF!
This is the most fun part. (Make sure the paint is dry though!)

Step 5:

Cut off any excess felt.

Step 6:

Use your pointy object to open up two holes on equal sides of your felt piece. I folded mine in half to make sure it was even.

At this point you can either string a ribbon or some embroidery thread through the holes and be done with it OR attach it to a jewelry chain by poking a jump ring through each hole:

Yay, jump ring action shot!

And then attaching the rings to your chain!

TADAA!!

Here is my sis modeling it with style (and a PF Changs for birthday dinner):

SO PURTY!

And this freezer paper techinique is good for ALLL kinds of things like putting your designs on tshirts… pillows… wall hangings… go crazy!

GO CRAZY!

Ok, not that crazy.

I <3 the Fishes, They’re So Delicious

For Father’s Day, I made my daddy a custom “lazy suzan” turntable thingy!

I picked up a really old and faded Ikea-brand lazy susan at the thrift store, drew a fishy design on it (my daddy is quite the fisherman) and set to it with my trusty woodburning tool.

*segue* Have I told you about my trusty woodburning tool? It looks like this and not only does it let me burn designs into wood, but I can solder things and melt plastic and…. MWUAHAHAHAA. I love it and have to sit on my hands to avoid the urge to burn holes in things with it.

Anyway, after carving my fishy design into it:

*Cute dead fishies!*

Continue reading

DIY Lazy Susan with Woodburned Fish Design for Father’s Day

For Father’s Day, I made my daddy a custom “lazy suzan” turntable thingy!

I picked up a really old and faded Ikea-brand lazy susan at the thrift store, drew a fishy design on it (my daddy is quite the fisherman) and set to it with my trusty woodburning tool.

*segue* Have I told you about my trusty woodburning tool? It looks like this and not only does it let me burn designs into wood, but I can solder things and melt plastic and…. MWUAHAHAHAA. I love it and have to sit on my hands to avoid the urge to burn holes in things with it.

Anyway, after carving my fishy design into it:

*Cute dead fishies!*

I applied a stain and sealant.


Btw, ignore the strategically placed sea creatures, they are blocking out my addresses. 10 points if you already spotted them!

I don’t have a picture of it dry, but the wood is a much better color in person.

This is a super easy gift to make, just thrift some wooden stuff and decorate! You could do pepper grinders, picture frames (I have one I’m working on actually), or even go all out and do something huge like a whole bookcase!

And if you aren’t that craftily inclined, but like to draw or illustrate, this is a good way to start edging your way over to the dark side (with Craft Vader and yarn-ball-shaped Deathstars).

Now to find a lightsaber attachment for my woodburning tool…

Pllaannttttss!!!!! And Mini Tutorial.

Wheehoowwheehooowheeehooooo.

(That there was the sound of me hyperventilating)

Ok.
So first of all, I have a serious problem. I often anthropomorphize inanimate objects.

Kitchen appliances….

Household objects…

My lunch…

But most of all, plants.

LOOK HOW CUTE!!!!

They are like babies! Darling little green babies! Everyone loves babies!!

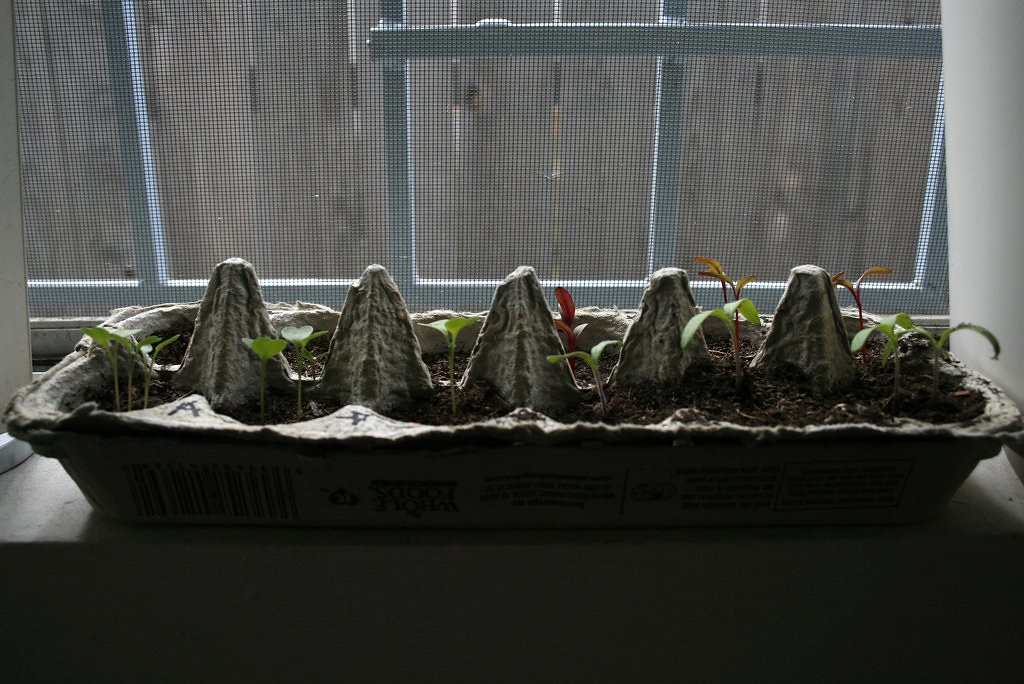
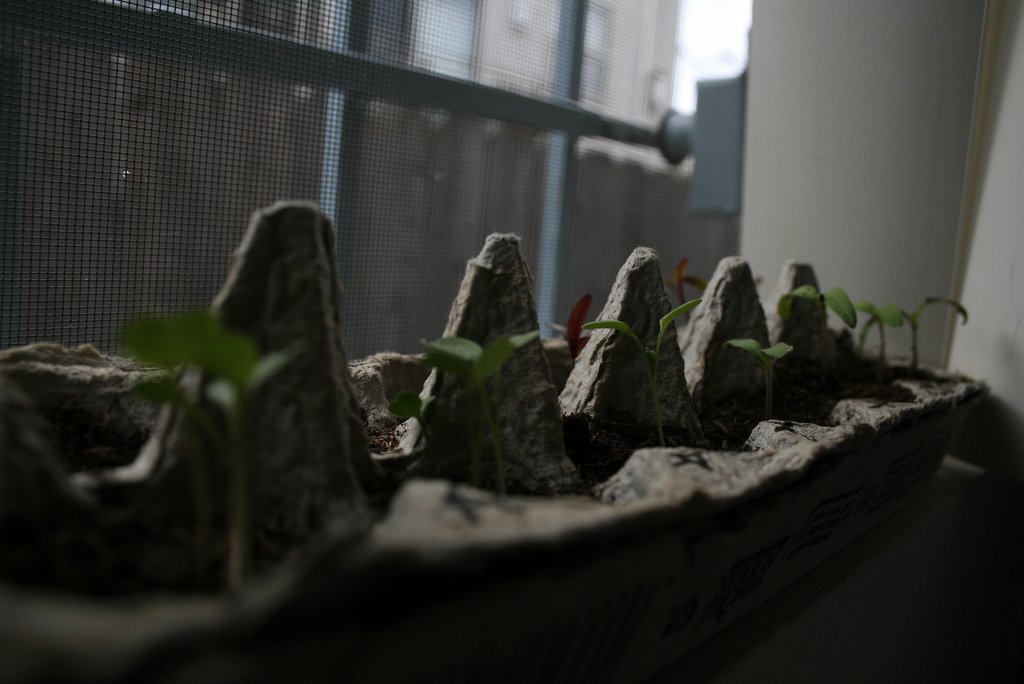
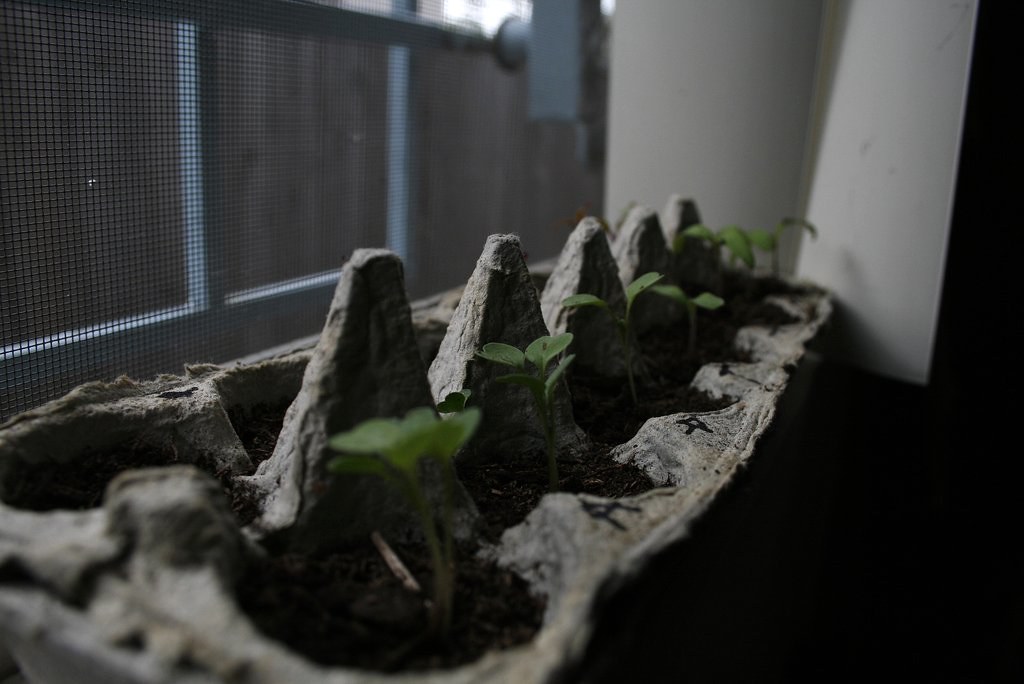
I planted these ADORABLE little seedlings in an egg carton on my windowsill and I LOVE them

Like they are my very own family.

Everyday when I wake up, and before I go to sleep, and sometimes at other random times during the day, I go over and marvel at how they’ve grown in the last 20 minutes since I last took a look.
Sometimes they are angled a different direction, sometimes I can see a new little leaf budding out.

GAAHH SO CUTE!!!!
I’ve done everything short of naming them.

And not even because that’s a little weird, but because if one of them ends up not making it…

That would be just to much for me to handle.

Anyway, if you don’t have seedlings in YOUR windowsill yet, you need to do it NOW. NOW!!! ALL PLANTS NEED HOMES!!!!

Seriously, this mini tutorial is so simple, I don’t know how you could NOT do it.

Adorable Little Sprout Babies for Your Windowsill:

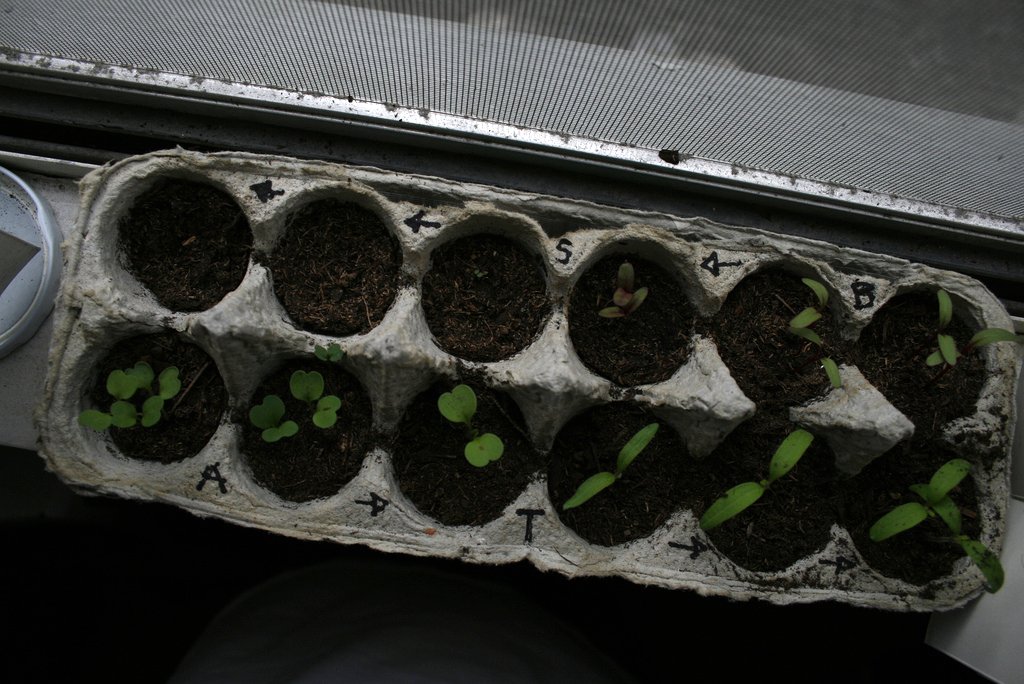
Front row: Arugula, Tomato. Back row: Beets and Spearmint (which is super tiny).

INGREDIENTS

-1 egg carton (sans eggs)

-dirt (no backyard?)

-seeds (try these!)

-something pointy (!)

Step 1

Separate the top of the carton from the bottom half.

Step 2

Poke holes in the bottom of where the eggs usually sit for drainage (using your pointy thing). Stack that half of the carton on top half of the carton (like a tray!)

Step 3

Fill each little egg-seat with dirt!

Step 4

Insert seeds -> into dirt (according to seed package directions).

Step 5

Water and wait.

Step 6

LOVE YOUR BABIES!!

You could also line the tray with packing tape or plastic if you are worried about water coming through, but I haven’t had much of a problem with that.
Also, alot of books and people have all these different opinions on what to stick your seeds in to make them grow right.
I don’t know nothing about that.
I was getting really confused about “peat” and “vermiculite” and other creepy sounding things, so I just went for it and stuck them in potting soil. If you are using plain old backyard dirt you might want to rev it up a little bit with compost, but hey, I ain’t no expert. Ask her -> You Grow Girl

Tips from someone who knows only slightly more than you do:

-Poke a hole in a water bottle cap for easy watering!
-Don’t over water! I learned this from killing off many a basil plant.
-Because the carton is biodegradable, it is super easy to transplant once your seedlings get big enough to take on the world. Just separate each little pod and stick in the ground (or bigger container). You might want to tear the carton around the roots to set them free a bit. But I’m not sure, I haven’t gotten that far yet.
-Plants love haikus. Tell them some and they’ll grow better.

YAY!

I am currently in the process of building these little guys a bigger home. (Geez, they grow up so fast! *tear*)

Because I lack a backyard, a balcony or a windowsill wider than an egg carton, it may be a feat, but I’ll keep you updated.

Happy planting!

MORE PICTURES!!

Light Me Up, Up, and Away.

Yesterday I posted about Lucia Holm’s photography and made the remark that I wanted an illuminated umbrella like the one in this picture.

Try as I might to restrain the yearning, I am intrigued by the idea.
But Sam, I tell myself, not only does San Diego get less than 12 inches of rain a year, but we are in a DROUGHT! You couldn’t even justify getting yourself some wellies during the week that it DID rain!
Well self, just shuddup.

Sockmaster from Instructables has a great tutorial for an LED umbrella.

Continue reading

Light Me Up, Up, and Away.

Yesterday I posted about Lucia Holm’s photography and made the remark that I wanted an illuminated umbrella like the one in this picture.

Try as I might to restrain the yearning, I am intrigued by the idea.
But Sam, I tell myself, not only does San Diego get less than 12 inches of rain a year, but we are in a DROUGHT! You couldn’t even justify getting yourself some wellies during the week that it DID rain!
Well self, just shuddup.

Sockmaster from Instructables has a great tutorial for an LED umbrella.


I equally love this one, with the lights in dotted lines (there’s also a dimmer attached!), and the one from the Lucia Holm photograph, with the black umbrella and just a glowing underside.

So what if it doesn’t rain here?

I imagine a bunch of the black glowing umbrellas stuck up in the branches of a big oak tree for a party or wedding or just everyday, if you are so lucky enough to lead such a whimsical life.

BTW, have I mentioned how obsessed I am with lights in trees?

Trish Mayo

I dunno what it is, but something about glowing lights + trees + dusk just creates something so beautiful in my mind. And it’s not like an “oohh pretty” kind of beautiful.
It’s more like wonder and awe of a harmonious meld of human and nature.
Seriously one of my most favorite things. If I ever do one of those “my favorite things” posts, lights in trees will be on it.

Did anyone see the Tim Burton Alice in Wonderland?
This movie warrants a whole new post, but I have to say that hands down the best part of the movie was the ending credits with the Avril Lavigne song and the mushrooms growing out of the frame.
I mean, I’ll leave it to you to insinuate what I think of the rest of the movie, but the ending credits are gold.

Anyway, that is relevant because when the mushrooms grow really big, they are illuminated from under the cap and it was the best thing ever.

Really.
On par with lights in trees.

SWEET FREEDOM!

I had my last final today…

SPRING BREAK!

woohoo!

Thiiis time around I am going to make the best of it.
LOTTSA crafting.
aaand..
I’m going to LA for the first time ever!
Can you believe that I live in San Diego and have never been to L.A.?
I really, really don’t get out much.
I’m going on Monday with one of my oldest and most fabulous friend.
Our destination is the garment district and all the goodies it will behold.
I am going to try to load up on some fabric so I can get my sewin’ on!

BY THE WAY…

I had entered a contest on Instructables.com a while back with my ruffle scarf tutorial (which is the first post I ever did on this blog). Grand prize is this great serger/embroidering/everything machine and 1st prize is a dress form.

Well… I am a finalist! Go read my instructable here.

OMG I had brown hair.

The contest is in the judging stage now, and the results will be in Monday.
Now, take a moment to imagine me standing in the middle of the L.A. garment district, and finding out that I won a serger or dress form.
What fate!
What providence!
What a great excuse to spend monies on fabric!

Regardless, I am happy just to be a finalist, and either way I am really starting to up my sewing anty.  If I don’t have the good luck of winning a serger, I am going to start trying to save up money to get one myself.
I just have this huge itch to sew knit fabrics.
My own hoodies and rib-knit tank tops (my favvvvorite) and and and….
**droooool**

Anyway, I feel like I am going to be on a posting roll for at least the next week. I’m going to hammer out pictures of all those projects I’ve done but haven’t mentioned (you mean you didn’t know?) and all those tutorials I have backed up, as well as some great pictures from L.A. on Monday coming up!
Yay!

SWEET FREEDOM!

I had my last final today…

SPRING BREAK!

woohoo!

Thiiis time around I am going to make the best of it.
LOTTSA crafting.
aaand..
I’m going to LA for the first time ever!
Can you believe that I live in San Diego and have never been to L.A.?
I really, really don’t get out much.
I’m going on Monday with one of my oldest and most fabulous friend.
Our destination is the garment district and all the goodies it will behold.
I am going to try to load up on some fabric so I can get my sewin’ on!

BY THE WAY…

I had entered a contest on Instructables.com a while back with my ruffle scarf tutorial (which is the first post I ever did on this blog). Grand prize is this great serger/embroidering/everything machine and 1st prize is a dress form.

Well… I am a finalist! Go read my instructable here.


The contest is in the judging stage now, and the results will be in Monday.
Now, take a moment to imagine me standing in the middle of the L.A. garment district, and finding out that I won a serger or dress form.
What fate!
What providence!
What a great excuse to spend monies on fabric!

Regardless, I am happy just to be a finalist, and either way I am really starting to up my sewing anty.  If I don’t have the good luck of winning a serger, I am going to start trying to save up money to get one myself.
I just have this huge itch to sew knit fabrics.
My own hoodies and rib-knit tank tops (my favvvvorite) and and and….
**droooool**

Anyway, I feel like I am going to be on a posting roll for at least the next week. I’m going to hammer out pictures of all those projects I’ve done but haven’t mentioned (you mean you didn’t know?) and all those tutorials I have backed up, as well as some great pictures from L.A. on Monday coming up!
Yay!